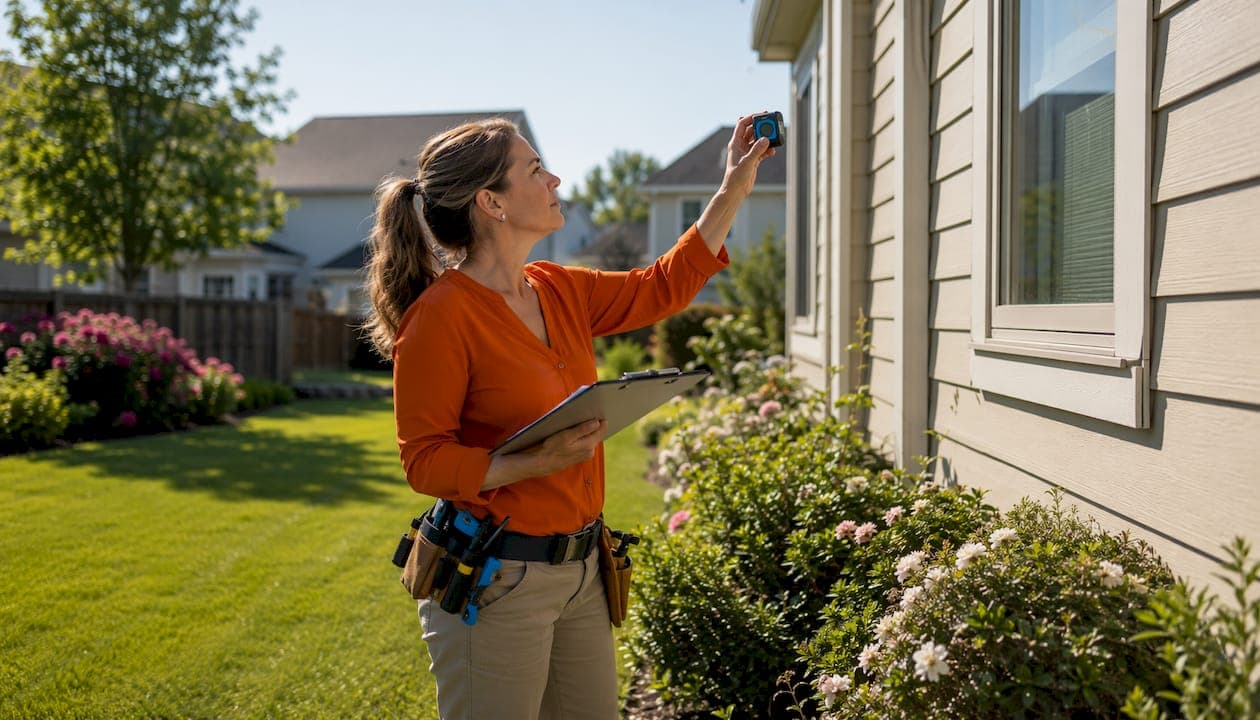
A home insurance audit, more commonly called a home insurance inspection, is a carrier-ordered property assessment designed to verify that your policy accurately reflects your home's replacement cost, condition, and risk factors. It is not a market-value appraisal, and it is not the same as the inspection a buyer orders before closing. The insurer sends an inspector to confirm that what was stated on your application matches reality and that no hazards exist that would change how your home is underwritten. The outcome can range from no change at all to a premium adjustment, a required repair, or, in rare cases, a nonrenewal.
Here is what you can do right now if an inspection has been scheduled:
- Confirm the inspector's identity by calling your insurer directly before granting access.
- Document your home's current condition with time-stamped photos of the roof, electrical panel, HVAC, and plumbing.
- Gather receipts and permits for any recent repairs, upgrades, or renovations.
- Plan access to attic hatches, crawlspaces, and detached structures so nothing is blocked on inspection day.
Table of Contents
- What is a home insurance audit, and what happens during one?
- Why do insurers conduct inspections, and what triggers one?
- How often will your home be inspected?
- What do inspectors actually look for? Your home insurance audit checklist
- How to prepare for your home insurance inspection
- How inspection findings affect your premium, coverage, and policy status
- Red flags that change underwriting outcomes, and what not to say
- What to do after the inspection: repairs, timelines, and how to dispute findings
- Agency perspective: why audits matter and what carriers are actually deciding
- Key Takeaways
- What the inspection process gets wrong, and what actually protects you
- Mfandtna is ready to help you through any inspection or audit
- Useful sources and further reading
What is a home insurance audit, and what happens during one?
Inspections range from a quick drive-by photo survey to a full interior systems check. The insurer decides the scope based on the home's age, value, and any risk signals flagged during underwriting.
Common inspection types:
- Exterior-only (photo-driven): The most frequent format. An inspector or drone photographs the roof, siding, and grounds, often without advance notice. You may never know it happened.
- Interior and exterior: Scheduled access is required. The inspector walks through living spaces, attic, and basement in addition to the exterior.
- Four-point inspection: Focuses specifically on the roof, electrical system, plumbing, and HVAC. Common for older homes or high-value properties.
- Renovation-focused audit: Triggered when coverage is increased after major improvements, to verify permitted work and updated replacement cost.
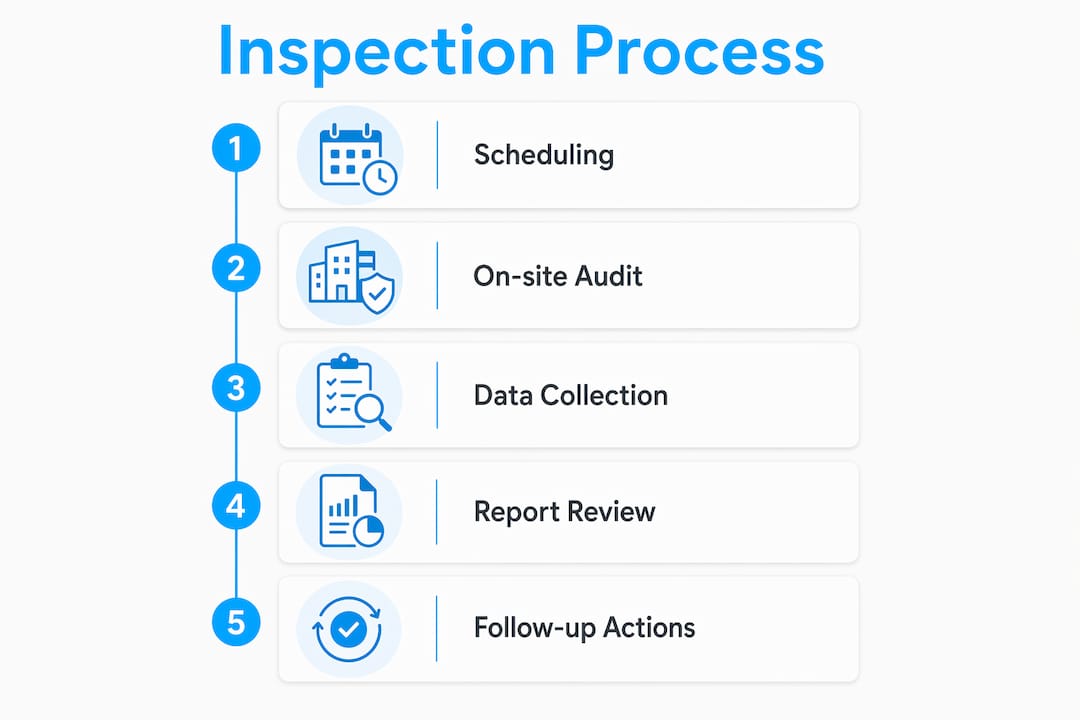
How a typical inspection runs, step by step:
- Inspector arrives and presents credentials (ask to see them).
- Exterior photos and measurements are taken, including detached structures.
- If interior access is required, the inspector checks systems and notes condition.
- The inspector submits a condition report to the carrier's underwriting team.
- Underwriting reviews the report and issues any findings or required actions.
The inspector is capturing data for underwriting, not performing repairs or code enforcement. They measure square footage, check construction materials, and document detached structures because these factors directly affect replacement-cost calculations. This is a key distinction from a buyer's home inspection, which evaluates the property's condition for a purchase decision, or an appraisal, which estimates market sale price. An insurance inspection calculates what it would cost to rebuild your home using current materials and labor.
Why do insurers conduct inspections, and what triggers one?
Insurers inspect to verify application details, confirm accurate replacement cost, and identify hazards that affect underwriting and pricing. The goal is to make sure the policy reflects the actual risk, which protects both the carrier's ability to pay claims and your ability to collect on them.
Common triggers include:
- New policy binding: Inspections commonly occur within the first 30–90 days after a policy goes into effect.
- Upcoming renewal: Carriers review properties near renewal dates, especially if the home hasn't been inspected recently.
- Post-claim verification: A significant claim often prompts a follow-up inspection within weeks to assess current conditions.
- Major renovations or additions: Home renovation projects frequently trigger audits because insurers need to verify increased replacement cost and confirm that work was permitted. Understanding how renovation costs are calculated helps you anticipate what documentation the carrier will want.
- Random portfolio reviews: Carriers periodically audit their entire book of business to maintain consistent underwriting standards.
The insurer typically covers the cost of the inspection as part of its underwriting process. You are not billed for it.

How often will your home be inspected?
There is no single schedule. Frequency depends on your policy's age, your home's age and value, your claims history, and the carrier's own portfolio review cycles.
That said, some patterns are consistent:
- Routine exterior checks often occur at each renewal cycle for properties that haven't had a recent review.
- Four-point inspections are more common for homes older than roughly 10–20 years or for high-value properties where replacement-cost accuracy matters most.
- Targeted reinspections happen after a deficiency is reported as fixed, to confirm the repair was completed.
Risk-based factors that raise inspection frequency include older systems (wiring, roof, plumbing), recent claims, major renovations, or shifts in the carrier's underwriting standards. If your home has any of these, expect more frequent contact. Understanding why insurance requires home maintenance gives you a clearer picture of how carriers think about ongoing risk.
What do inspectors actually look for? Your home insurance audit checklist
Inspectors focus on the areas that drive the largest and most frequent claims. The four core systems are the roof, electrical wiring, plumbing, and HVAC. Beyond those, they note visible structural and safety hazards.
Exterior checklist:
- Roof condition, age, and visible damage (missing shingles, sagging, moss)
- Siding condition and any signs of rot or impact damage
- Gutters and downspouts (clogged or detached)
- Trees overhanging the roof or close to the structure
- Pools, trampolines, and fencing around them
- Detached structures (garage, shed) and their condition
- Grading and drainage near the foundation
Interior checklist:
- Water stains on ceilings or walls indicating past or active leaks
- Attic and crawlspace condition, including ventilation and moisture
- Signs of mold or mildew
- Visible plumbing leaks under sinks or around fixtures
- Condition of stair railings and handrails
- Smoke detectors and carbon monoxide detectors (presence and function)
Systems checklist:
- Electrical panel condition; flags for knob-and-tube or aluminum wiring
- Water heater age and visible condition
- Furnace and air conditioning age and visible issues
Safety checklist:
- Pool fencing compliance
- Trip hazards on walkways or steps
- Locks on exterior doors
- Alarm systems (burglar and fire)
Inspectors document findings with photos, measurements, and standardized condition-reporting forms. The data feeds directly into the underwriting review.
Pro Tip: Keep receipts, warranties, permits, and before-and-after photos of completed repairs in a dedicated folder. Submitting these proactively to your agent can shorten the underwriting review cycle and head off interim restrictions.
How to prepare for your home insurance inspection
Preparation reduces the chance of avoidable flags and speeds up the underwriting decision. Most of what inspectors flag as problems are things homeowners already know about but haven't documented or addressed.
Gather these documents before the inspection:
- Current policy declarations page
- Receipts for recent major repairs or upgrades (roof, HVAC, electrical, plumbing)
- Permit records for any renovations
- Contractor warranties and completion certificates
- Utility or maintenance service records
Access and tidiness:
- Clear the path to attic and crawlspace hatches.
- Remove clutter around the electrical panel so it's fully visible.
- Clear exterior walkways and gates to detached structures.
- Secure pets before the inspector arrives.
Dos and don'ts:
- Do provide documentation for every completed repair or upgrade.
- Do be straightforward about renovations and when they were completed.
- Don't obstruct access to any area of the home.
- Don't make verbal admissions about unpermitted work without having documentation ready to provide through your agent.
Pro Tip: Take time-stamped photos of your roof, electrical panel, water heater, and HVAC unit the day before the inspection and email them to your agent. This creates a dated record that can support your case if any findings are disputed.

How inspection findings affect your premium, coverage, and policy status
Inspection reports typically lead to one of a few underwriting actions. Understanding the range helps you respond quickly and protect your coverage.
Possible outcomes include:
- No change: The inspection confirms the property matches the application. Your policy continues as written.
- Conditional acceptance with repair deadline: Minor maintenance issues trigger a notice requiring repairs within a set period, commonly 30–90 days. Completing and documenting the repairs typically restores standard terms.
- Premium adjustment or coverage modification: A system risk (such as an aging electrical panel) may result in a higher premium, a coverage restriction, or a requirement to replace the system.
- Nonrenewal or cancellation: Severe or uninsurable conditions can lead to nonrenewal at the policy's end or, in serious cases, mid-term cancellation following state-mandated notice periods.
Decision-tree guidance:
- Inspector finds minor maintenance issue → Carrier issues repair notice with deadline → Repair, document, and submit proof to your agent.
- Inspector finds system risk (e.g., outdated wiring) → Carrier may increase premium or restrict coverage → Get contractor estimates, complete the work, request reinspection.
- Inspector finds severe hazard → Carrier may nonrenew → Review your options with your agent immediately and consider whether a homeowners insurance FAQ can clarify your rights.
Pro Tip: Document completed repairs with dated receipts, permits, and before-and-after photos. Submit the full package to your agent and ask them to request a reinspection or underwriting review. A complete submission moves faster than a verbal update.
Red flags that change underwriting outcomes, and what not to say
Certain discoveries consistently shift underwriting decisions in an adverse direction. Knowing what they are lets you address them before the inspector arrives.
High-risk findings inspectors flag:
- Knob-and-tube or aluminum wiring
- Roof age exceeding the carrier's threshold (often around two decades depending on material)
- Visible water damage, active leaks, or signs of mold
- Unpermitted structural changes or additions
- Missing or non-functioning smoke and carbon monoxide detectors
- Unfenced pools or trampolines without liability coverage in place
What not to say during an inspection:
Avoid speculative or open-ended admissions. Saying "I've had leaks for years" or "I didn't pull permits for that addition" can create documentation problems that are hard to walk back. If the inspector asks about past claims or unpermitted work, a calm and honest response is: "I'll gather the documentation and have my agent provide the records." Then follow through.
The inspector's job is to observe and report, not to adjudicate. Refer factual questions about history to your agent, and back everything up with written proof rather than verbal statements.
What to do after the inspection: repairs, timelines, and how to dispute findings
Follow the insurer's written notice, meet repair deadlines, document completion, and request reinspection or underwriting review. Acting quickly and thoroughly is the single most effective way to protect your coverage.
Typical post-inspection timeline:
- Carrier issues written findings with a cure deadline (commonly 30–90 days).
- You complete the required repairs within the stated period.
- You submit proof: dated receipts, contractor invoices, permits, and photos.
- You or your agent request a reinspection or underwriting reconsideration.
- Carrier reviews the submission and updates the policy accordingly.
Steps to dispute a finding:
- Review the inspection report carefully for factual errors (wrong measurements, incorrect system ages, misidentified materials).
- Gather contradictory evidence: contractor statements, permits, dated photos, and manufacturer documentation.
- Escalate to your agent, who can submit the evidence directly to underwriting.
- If the dispute is unresolved, file a formal complaint with your state insurance department. Under most state insurance codes, carriers must provide advance written notice before adverse policy actions, typically 30 days for mid-term cancellations and 30–60 days for nonrenewals. Knowing this timeline gives you a clear window to act.
Reviewing your policy's inspection clause helps you understand exactly what the carrier can and cannot require. A guide on how to read a homeowners insurance policy walks you through the relevant sections.
Agency perspective: why audits matter and what carriers are actually deciding
Audits protect underwriting accuracy and the insurer's ability to pay claims. Compliance with inspection clauses is a policy obligation, not optional. Refusing a necessary inspection can be grounds for a carrier to cancel or nonrenew a policy for noncompliance with policy terms.
Carriers use standardized property condition report formats, such as those published by the Insurance Services Office (ISO), now part of Verisk Analytics, to capture data consistently across their entire portfolio. This is how underwriting decisions stay defensible and comparable across thousands of properties.
State insurance codes generally require carriers to provide advance written notice before adverse policy actions. Common windows are 30 days for mid-term cancellations and 30–60 days for nonrenewals. These protections give you time to respond, repair, and appeal.
Practical negotiation tips from agency experience:
- Provide documentation immediately when a finding is issued. Speed signals good faith.
- Get contractor estimates quickly, even before the repair is scheduled.
- If a repair requires permitting, ask the carrier for a conditional extension in writing.
- Use an independent contractor's written statement when disputing a technical finding such as system age or material type.
Pro Tip: Involve your agent the moment an inspection is scheduled. Carriers are more likely to allow reasonable cure periods when an agent coordinates the repair submission and confirms completion directly with underwriting.
Key Takeaways
A home insurance inspection is a carrier-ordered property assessment that verifies replacement cost and risk factors, and its findings can change your premium, coverage terms, or policy status.
| Point | Details |
|---|---|
| What an inspection is | A carrier-ordered assessment of replacement cost and risk, not a market-value appraisal. |
| Common triggers | New policy, renewal, post-claim review, major renovation, or random portfolio audit. |
| Prepare with documentation | Gather receipts, permits, and dated photos before the inspector arrives to avoid avoidable flags. |
| Outcomes range widely | Findings can result in no change, a repair deadline, a premium increase, or nonrenewal. |
| Mfandtna can help | Mfandtna reviews inspection findings, coordinates repair documentation, and works with carriers to protect your coverage. |
What the inspection process gets wrong, and what actually protects you
Most homeowners treat an insurance inspection as something that happens to them. That framing leaves them unprepared. The inspection is actually one of the few moments in the policy relationship where your documentation and responsiveness directly shape the outcome.
Carriers are not looking for reasons to cancel policies. Cancellations are expensive for them too. What they are doing is making sure the risk they agreed to insure still matches what they are being paid to cover. When a homeowner shows up with dated receipts, permits, and contractor statements, the underwriting conversation changes. The inspector's report becomes one data point, not the final word.
The conventional wisdom says "just fix what they flag." That is incomplete. The smarter move is to document proactively, submit evidence before the deadline, and use your agent as the communication channel. Carriers respond differently to a well-organized submission from an agent than to a homeowner calling in with verbal assurances. The paperwork is not bureaucratic friction. It is your leverage.
One more thing most guides skip: if your premium increases after an inspection, that is not necessarily the end of the story. Completing the flagged repairs and requesting a reinspection can bring the rate back down. Knowing how to lower your homeowners insurance premium after an inspection is a concrete, available option that most homeowners never pursue because no one told them it existed.
Mfandtna is ready to help you through any inspection or audit
Facing an inspection finding or a potential coverage change is stressful, but you do not have to sort through it alone. Mfandtna has spent over 30 years helping homeowners across multiple states prepare for inspections, compile repair documentation, and work directly with carriers to avoid nonrenewal. The agency reviews your policy language, explains what the carrier can actually require, and coordinates reinspection requests on your behalf.
If an inspection has changed your coverage or triggered a premium increase, the most useful next step is a free policy review. Mfandtna can identify whether your current policy still fits your situation or whether a better option exists. Request a free quote or visit the homeowners insurance services page to get started.
Useful sources and further reading
These resources provide reliable, authoritative information on home insurance inspections, state notice requirements, and replacement-cost calculations. Check your state insurance department's website for exact notice periods and carrier-filed underwriting guidelines, as deadlines vary by state.
- LegalClarity: Why does my insurance company want to inspect my house? — Explains inspection triggers, what inspectors measure, and the difference between replacement cost and market value.
- Home Insurance Authority: Home inspections for insurance purposes — Covers inspection outcomes, ISO/Verisk reporting formats, state notice requirements, and the consequences of refusing an inspection.
- Northeast Republicans: Home improvement insurance audits preparation guide — Practical preparation guidance for renovation-triggered audits, including documentation checklists.
- U.S. News: What is a home insurance inspection? — Broad consumer overview of inspection types, timing, and what to expect.
- Progressive: Home insurance inspection overview — Insurer-perspective explanation of why inspections occur and how findings are used.
- Your state insurance department — Search "[your state] department of insurance" for complaint procedures, notice-period requirements, and consumer rights during adverse policy actions.